More-so than previous entries in the Assassin’s Creed series, Valhalla puts a heavy emphasis on the mystical. One whole section of the game is dedicated to the lingering legacy of a man that practiced dark magic and studied the occult. Lerion was a scourge in England and drew the attention of the elite that wished to quell the potential for a dangerous and deadly cult. The practitioner perished at the hands of powerful English families, but his daughters evaded assassination and carried on with their father’s work.
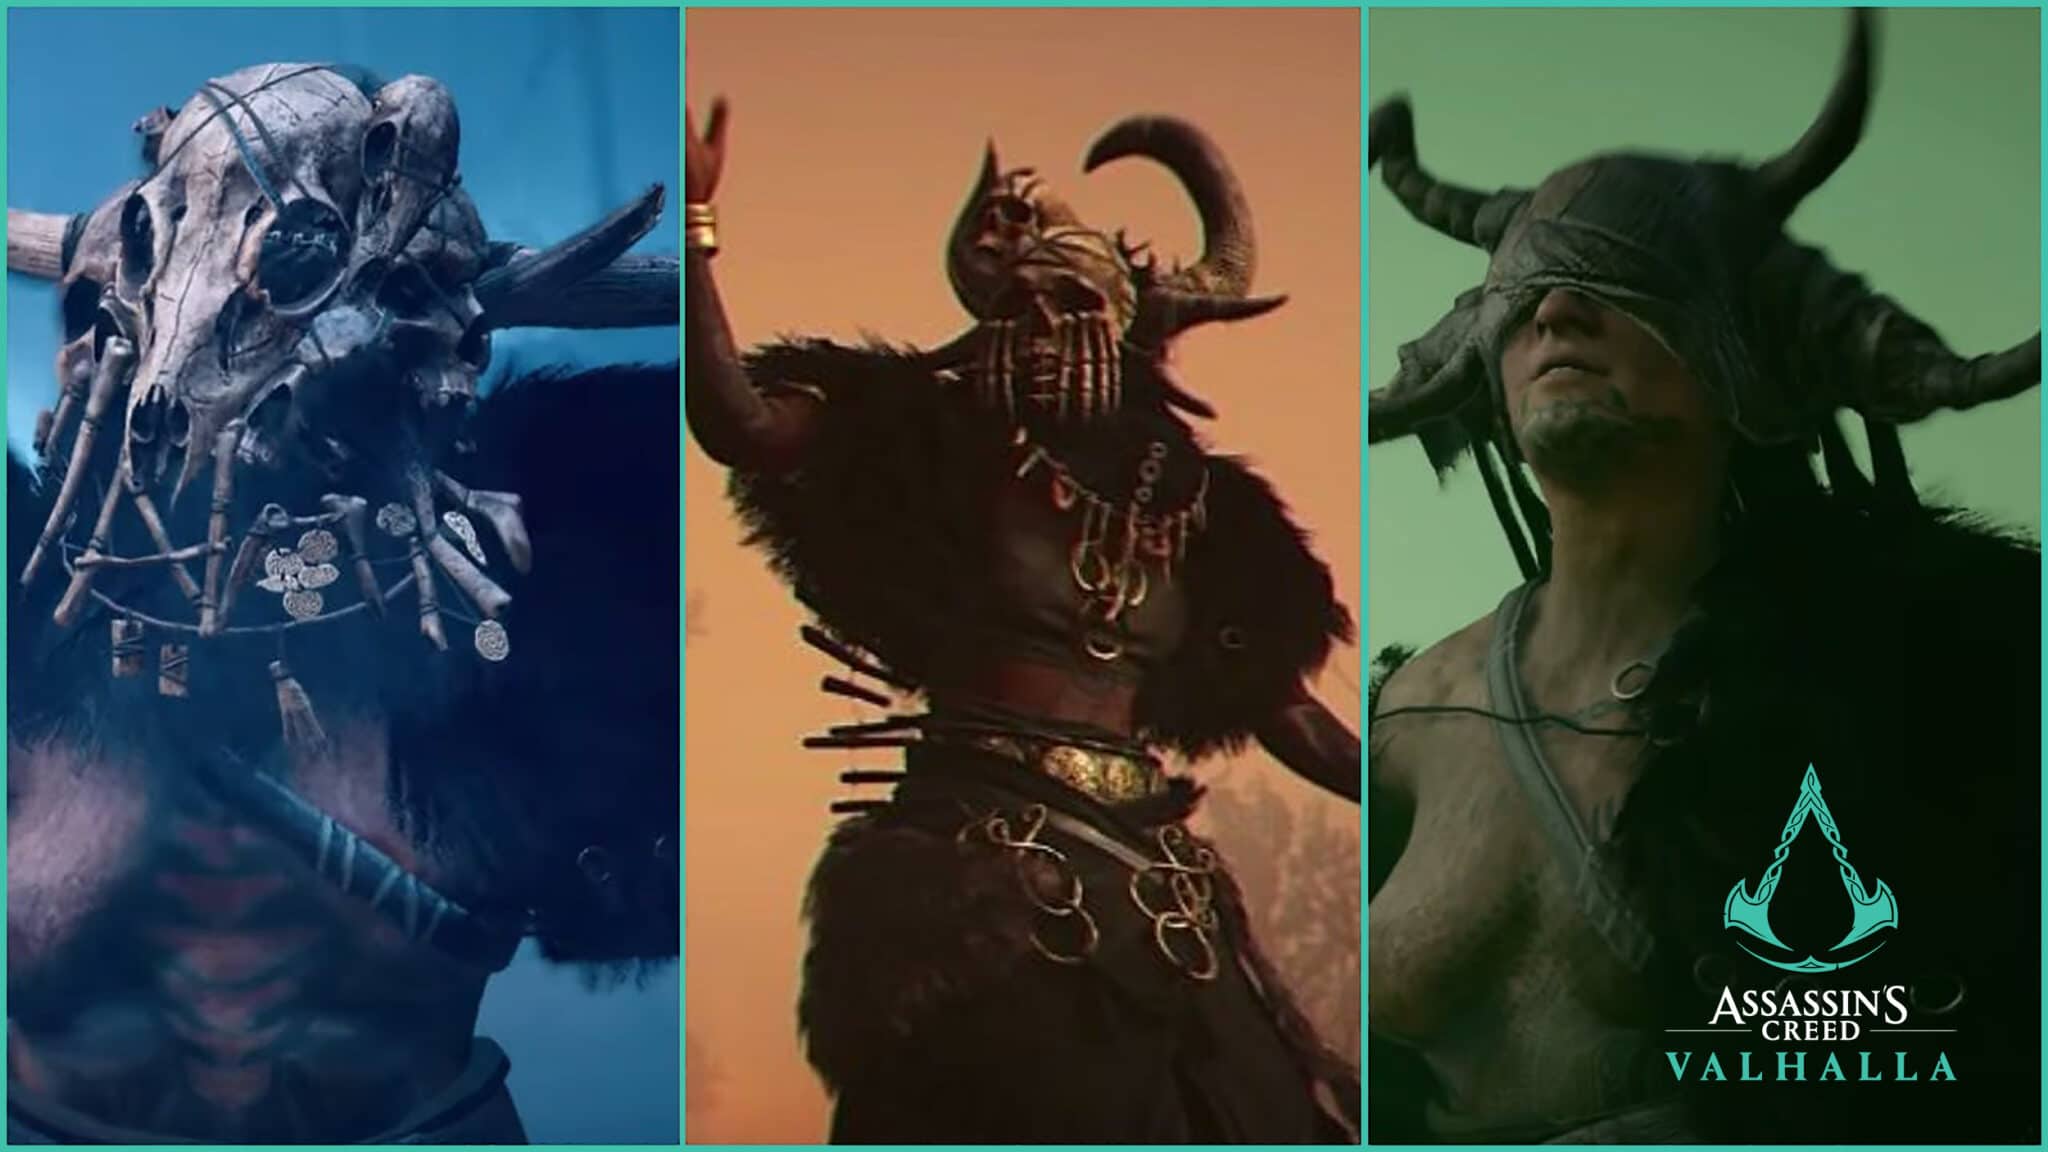
The Daughters of Lerion are now a thorn in Eivor’s side. Goneril, Cordelia, and Regan are powerful sorceresses skilled in the very magics that got their father killed. Slaying the daughters is an optional quest for Eivor, but the rewards are worth the hassle.
Should you be up for the challenge, you’ll find a breakdown of each daughter below – where you’ll find her, the best way to kill her, and the treasures that await once she falls.
Goneril – Power Level 90
Minimum Recommended Power Level: 50
Reward: Thor’s Breeches and Goneril’s Dagger
Location: Spalda Fens, Northeastern Grantebridgescire, England. You’ll find Goneril hiding in an arena north of Ely Monastery. Seek out a large decaying tray among the swamps and find a desecrated body. This will stir Goneril.
Battle Tips: Goneril is the weakest of the three daughters, but don’t get cocky. Her proficiency with her twin blades can end this fight real quick, especially if you’re not ready for her incredible speed. Due to her swift attacks, you’ll be dodging a lot. Consider Brush with Death for that opening to land a blow after evading an attack. You’ll also want range in this fight, so Heavy Dual Wield is going to be an essential skill. Also, consider Valkyrie Dive and Rush and Bash to make things a little easier.
From her unblockable leaping slash to her spin attack and forward jump assault, Goneril employs a lot of quick strikes that require a quick response. Her teleportation skill is most troublesome, but there are opportunities to chip away at her health. Don’t bother trying to block. Just dodge and parry to knock her to her knees. A successful parry will stagger her backward before she drops. Here is where a long weapon like a spear comes in handy.
After half her health is gone, she’ll summon an explosive green mist. Just leave the area of attack and prepare for her second phase. Poisonous gas is one of her favorite attacks during the second stage, so just keep moving. Her continued teleporting may wear on you a bit, but just keep dodging. Find her pattern, and you’ll be able to take her down.
Regan – Power Level 160
Minimum Recommended Power Level: 100
Reward: Thor’s Battle Plate and Regan’s Dagger
Location: Walsham Crag, East Anglia, England. Look along the Northern coast of East Anglia for a sunken arena, just west of the Forward Camp and a ways east of Elmenham. The desecrated body you need to find is strewn out below the rocks in a rotten pit.
Battle Tips: If you haven’t sunk resources into Brush with Death, you may want to before taking on Regan. Like her sister, Regan sports a set of twin blades and lightning speed. She, too, is a fan of unblockable attacks – so guess what you’re going to be doing? A lot of dodging! Keep an eye peeled for runic symbols, which indicate an attack is coming your way.
One of Regan’s unique attacks is a mirror image of herself that rushes in your direction. A well-timed dodge will prevent any damage, but the shade is almost always part of the fight. She may kneel randomly during the fight, but don’t think you’ve won. In fact, back away and get your dodging finger read. The charge attack that follows is devastating, unblockable, and accompanied by a shade that can cause additional damage.
Regan is also capable of parrying. Don’t expect a flurry of attacks to work, as she’ll let a few land before knocking you back. Dive of the Valkyrie can break through her defenses, giving you more of a chance to inflict decent damage. Parrying will be your best friend against Regan. A good parry will set you up for a few strikes, which, in turn, will negate the shade she sends your way.
At half health, Regan also sets up an explosive area of effect attack that you can avoid by moving away. Her second phase is accompanied by enhanced abilities, more combo attacks, and frequent teleports. As she moves around the arena, she’ll leave behind fire trails that make dodging and parrying a bit more interesting. Fire resistance runes will reduce the damage you take, but getting caught in the flame can throw your groove off.
A bow and arrow will work to keep you away from the flames, but the distance from Regan won’t save you from a near insta-kill leaping grab.
Cordelia – Power Level 340
Minimum Recommended Power Level: 300
Reward: Thor’s Gauntlets and Cordelia’s Dagger
Location: Berkelow Bog, East Anglia, England. Trek to the Southwest corner of East Anglia and continue west from Grantebridge. A region full of ritual symbols will indicate that you’re in the right place. Find the desecrated corpse, investigate it, and be prepared for one brutal fight.
Battle Tips: It’s quite possible to take on Cordelia at any power level, but only the most skilled warriors should bother. Take her on when you’re level is too low, and she’ll kill you in just one or two strikes. Instead of focusing on power level, put more effort in ensuring you have skills that enhance your game in 1v1 fights, and your armor and weapons are maxed out.
Skills like Brush with Death, Parry Damage, Adrenaline Fiend, Last Chance Healing, and Grit will keep you alive, moving, and capable of landing those crucial blows. Many of Cordelia’s attacks are heavy. Most of them are unblockable. As with the other Daughters of Lerion, this will be a game of timing and patience.
Like Regan, Cordelia will parry if you try to land too many blows. Don’t get too greedy when you’re up close, as her return attack can end the bout pretty quickly. Cordelia’s signature moves include a leaping attack and an uppercut that may be accompanied by a second strike. You don’t really know when she’s going to throw in that follow up attack, so always be ready to move.
Her phantoms are the game changers in this battle. These shades will dash toward you and are incredibly difficult to avoid. Since dodging all three phantoms isn’t easy, you’ll want to keep her from summoning them altogether. When she teleports away from you, try skills like Harpoon Impalement to break her pattern. Dive of the Valkyries can also get you over the shades if you’re close enough, but you need to stagger her before she can summon more.
During the second phase of this fight, Cordelia sends out a wave of electricity. Her electrifying attacks are a nuisance, but all you must do is keeping moving. The lightning bolts will follow, but if you keep moving (and close the distance between you and the enchantress), you’ll be able to end this string of attacks with a staggering blow. Don’t linger, though, as she’ll go right into a parry with a second strike.
With enough patience and maybe a little practice, Cordelia will fall to your feet.
Lerion’s Treasure
With his daughters defeated and their daggers in your employ, it’s time to see why you went through all this trouble. Head to the Southeastern edge of East Anglia, just south of the river and Burgh Castle. A crumbling estate awaits, covered in runic symbols associated with Lerion’s mysticism.
Enter the crypt and follow the path deeper into the caverns to a fork in the road. Take the right fork to find the kneeling statue with three slots in its back. Interact with the statue to shove the daggers into its back and follow the path that opens.
Below you will lie a collection of riches, including Thor’s Helmet.

OSG News & Deals Newsletter
Get the latest gaming news, reviews, and deals sent to your inbox, FREE!